
Choosing a Calcaneal Locking Plate requires more than matching an implant to a radiograph. The calcaneus has thin cortical bone, complex surfaces, and limited soft-tissue coverage. Small contour errors can affect reduction, screw placement, and wound safety. Clinical experience shows that familiar systems are not always suitable for every fracture pattern. Careful planning matters.
This guide presents seven practical tips for evaluating plate design and performance. It considers fracture morphology, plate fit, locking-hole distribution, screw trajectory, and available instrumentation. Surgeons should also review bone quality, imaging findings, and the manufacturer’s technical data. A plate that looks strong on the table may not provide useful support in the posterior facet or anterior process. Details matter.
The decision should remain patient-specific. A simple intraoperative setup can reduce avoidable delays, especially when swelling, limited exposure, or unusual anatomy complicates the case. Experienced teams still make assumptions, and some are wrong. That is why trial positioning, fluoroscopic confirmation, and documented implant selection remain valuable. The following tips offer a structured starting point, not a substitute for surgical judgment, training, or institutional protocols. Consider the whole case.
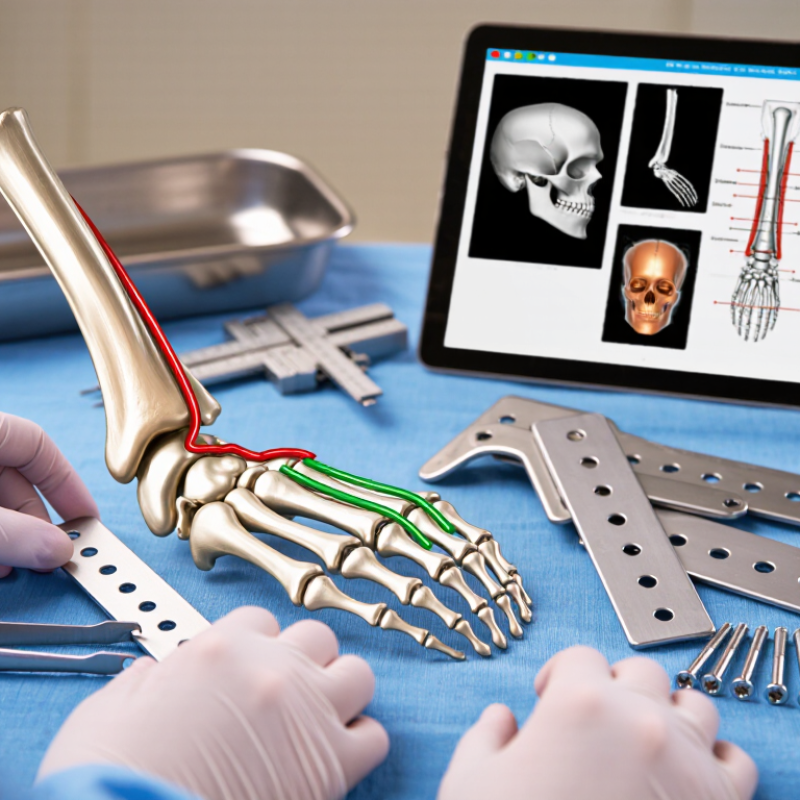
A calcaneal locking plate should match the fracture pattern, not merely the surgeon’s preferred shape. Computed tomography is essential for identifying posterior facet displacement, anterior process involvement, tuberosity separation, and lateral wall expansion. These details determine where support is needed.
A plate must follow the patient’s anatomy around the posterior facet and lateral calcaneal wall. Its screw trajectories should support key fragments without entering the subtalar or calcaneocuboid joints. Pay close attention to the sustentaculum tali. This small, strong fragment often provides reliable purchase, while severely comminuted bone may not. Bone quality also matters, especially in older patients or delayed cases.
Soft-tissue conditions can change the practical choice. A bulky implant may increase pressure beneath swollen skin. A low-profile design can reduce irritation, but it may offer less control in a highly unstable fracture.
There is no perfect plate for every pattern. Fit matters.
In clinical planning, I would compare the plate with the reconstructed calcaneus on multiple CT views. A design that looks suitable on one image may fail around the tuberosity or posterior edge. Surgeons should also consider reduction sequence, incision access, and screw length before implantation. These decisions are easy to underestimate. Careful templating remains more dependable than relying on plate shape alone.
Choosing a calcaneal locking plate starts with its shape. The plate should follow the lateral wall without excessive bending. A mismatch can create pressure points, soft-tissue irritation, or poor screw direction. Compare the plate with preoperative CT images, not only standard radiographs. Templates can mislead.
Coverage matters across the anterior process, posterior facet, and tuberosity. A narrow plate may leave important fragments unsupported. An oversized plate may complicate wound closure. Look for controlled support around the posterior facet. Check the posterior edge carefully. Small gaps can become meaningful after reduction. Bone quality also affects how much surface support is useful.
Screw-placement options deserve equal attention. Locking holes should support different fragments while avoiding the subtalar joint and the calcaneocuboid joint. Use oblique trajectories when direct screws cannot capture the sustentaculum or posterior facet safely. Confirm each path with multiplanar imaging. A screw may appear acceptable in one view but penetrate a joint in another. Surgeons should also assess medial wall proximity and nearby neurovascular structures. More holes are not automatically better. They can increase flexibility, but they may encourage unnecessary fixation. The best choice balances coverage, stability, soft-tissue tolerance, and the actual fracture pattern. Even experienced teams should reassess the fit after reduction, because the plate that looked ideal before surgery may no longer match the restored anatomy.
7 Tips for Choosing a Calcaneal Locking Plate
Tip 1: Assess bone quality before selecting the plate. Osteoporotic calcaneal bone may need multiple locking screws and broader load distribution. Tip 2: Match screw trajectories to the fracture pattern. A fixed-angle screw is useful only when it supports the correct fragment. Tip 3: Check the locking mechanism carefully. Threads should engage cleanly, without forcing the screw or stripping the plate.
Tip 4: Prioritize fixation stability around the posterior facet and lateral wall. These areas often carry important structural demands after reduction. Tip 5: Choose enough holes for controlled fixation, but avoid unnecessary bulk. Soft-tissue coverage can be limited near the heel. Tip 6: Confirm plate contour against the patient’s anatomy using detailed imaging. A small mismatch may create pressure, prominence, or poor fragment support. Tip 7: Reassess stability during surgery. Compression, screw purchase, and joint alignment can change after each reduction step.
Practical experience shows that locking features do not replace accurate reduction. They improve stability when matched to bone quality and fragment size. In very weak bone, excessive screw density may not solve poor purchase. I have found that careful planning is more reliable than simply adding hardware. Still, every case has limitations. Patient anatomy, swelling, fracture complexity, and surgical access can challenge an otherwise suitable design. Final selection should follow imaging, intraoperative findings, and sound clinical judgment.
| Selection Tip | Clinical Situation | Locking Feature to Evaluate | Why It Matters | Practical Selection Check |
|---|---|---|---|---|
| 1 Assess Bone Quality First | Osteoporotic, elderly, or highly comminuted calcaneal fractures may provide limited screw purchase. | Look for fixed-angle locking holes and a sufficient number of strategically distributed locking positions. | Locking screws create a fixed-angle construct with the plate and can reduce dependence on friction between the plate and weak cortical bone. | Review CT images for comminution and cortical thickness. Favor a construct that supports multiple independent screws rather than relying on one or two large fragments. |
| 2 Match Screw Trajectories to the Calcaneus | Fractures involving the posterior facet, sustentaculum region, body, or tuberosity require different points of fixation. | Evaluate multi-directional or variable-angle locking options, when available, together with predefined safe trajectories. | The calcaneus has irregular three-dimensional anatomy. Appropriate trajectories help capture key fragments while avoiding the subtalar joint and neurovascular structures. | Confirm that the plate allows screws to target the sustentaculum, posterior facet, lateral wall, and tuberosity without entering the joint or extending beyond the medial cortex. |
| 3 Prioritize Subchondral Support | Depression or displacement of the posterior facet threatens subtalar joint congruity and may leave a thin subchondral segment. | Select a plate with clustered subchondral screw holes that can support the posterior facet in multiple planes. | A well-positioned subchondral screw array helps maintain reduction of the posterior facet and distributes load across the reconstructed fragment. | Use fluoroscopy or intraoperative imaging to verify that screws are parallel or appropriately angled beneath the posterior facet without penetrating the subtalar joint. |
| 4 Balance Rigidity and Controlled Compression | Some fractures need rigid fragment support, while selected extra-articular or simple fracture lines may benefit from compression. | Consider a plate combining locking holes with compression-capable or combination holes. | Locking fixation preserves the planned screw angle, while conventional or compression functions can assist with interfragmentary compression when the fracture pattern permits it. | Do not use compression across a highly comminuted articular surface when it could shorten, displace, or collapse the reconstructed anatomy. Follow the fracture pattern and reduction objectives. |
| 5 Choose the Correct Plate Footprint | Calcaneal morphology varies, and excessive plate prominence can irritate the thin soft-tissue envelope over the lateral wall. | Check for an anatomically contoured profile, appropriate plate length, and low-profile edges that match the intended approach. | A good fit improves fragment coverage and may reduce the need for extensive bending. A prominent or poorly positioned plate can increase soft-tissue irritation and wound concerns. | Compare the plate with the patient’s imaging and exposure. Confirm coverage of the main fragments while avoiding unnecessary extension toward the peroneal tendons or the calcaneocuboid joint. |
| 6 Plan for Bone Loss and Void Management | Severe depression fractures may leave a metaphyseal or cancellous void after elevation of the posterior facet. | Favor a construct with adequate support under elevated fragments and enough fixation points to bridge areas of reduced bone contact. | A plate cannot replace missing structural support. Maintaining the restored shape may require subchondral support, graft or substitute selection, and a stable screw spread. | Assess whether the plate can support the elevated facet and posterior tuberosity without concentrating all load at a single screw. Document the planned void-filling strategy separately from plate selection. |
| 7 Verify Stability and Imaging Compatibility | Fixation must tolerate the expected postoperative loading protocol while preserving reduction during healing. | Review screw density, plate strength, insertion instrumentation, and radiographic visibility. | Stable fixation depends on the complete construct, including plate position, screw length, fragment capture, bone quality, and postoperative protection—not on locking status alone. | Confirm drill guides and locking drivers are compatible with the plate, measure screw lengths carefully, and obtain lateral, axial, and oblique images to check reduction, joint clearance, and hardware position. |
Clinical note: Plate selection should be based on fracture morphology, bone quality, soft-tissue condition, surgical approach, and the surgeon’s fixation strategy. Locking fixation improves angular stability but does not eliminate the need for accurate reduction, correct screw placement, and appropriate postoperative protection.
Calcaneal plates must balance fixation strength with soft-tissue tolerance. Titanium alloys have an elastic modulus near 110 GPa, while stainless steel approaches 190–200 GPa, according to ASM International materials data. Neither option is automatically superior. Titanium may reduce stiffness mismatch, but its lower surface hardness can complicate contouring and handling. Check screw-plate compatibility carefully.
Profile matters near the lateral wall. A prominent edge can press against thin skin, especially when swelling persists. The 2021 systematic review in Injury reported wound complications after calcaneal fracture fixation commonly within the 10–20% range, depending on approach and patient factors. That figure should influence design selection, not dictate it. A low profile helps.
Soft-tissue compatibility includes more than plate height. Review the edge radius, screw prominence, available contours, and closure tension. AO Surgery Reference emphasizes respecting vascularity and minimizing unnecessary soft-tissue disruption. In practice, I would place the template over a three-dimensional model and inspect the peroneal tendon region. Small conflicts become obvious there.
Material, profile, and contour must match the fracture pattern. A very thin plate may feel attractive, yet it can lack useful support in comminuted zones. Conversely, excessive bulk may create pressure beneath the skin. My own selection would remain cautious, because bench strength does not predict every wound problem. Patient smoking status, swelling, bone quality, and incision planning still matter. Poor fit remains poor fit.
Choosing a calcaneal locking plate begins with imaging support, not the product catalogue. Review high-quality radiographs and CT scans from several planes. CT helps reveal fracture lines, bone loss, joint depression, and the available screw corridors. The plate should match the patient’s anatomy, not merely resemble a familiar design. Confirm that its shape supports the posterior facet and lateral wall without excessive prominence. Small differences matter.
Instrumentation deserves equal attention. Check whether the set includes accurate guides, drill sleeves, depth gauges, reduction tools, and implants in suitable lengths. Locking screws need reliable alignment and tactile feedback during insertion. Fluoroscopy should show the plate, screw tips, subtalar joint, and critical soft-tissue boundaries clearly. Poor imaging can turn a technically sound plan into guesswork. Do not trust one view.
Surgical applicability is more than fitting metal onto bone. Consider the planned approach, incision limits, patient positioning, fracture complexity, and the surgeon’s working space. A useful system should support reduction, provisional fixation, and final stability without unnecessary instrument changes. Confirm that the guides can reach difficult posterior and anterior regions. In practice, a plate may appear ideal on CT but become awkward through the chosen incision. That mismatch deserves honest review. Surgical teams should rehearse the workflow, identify missing tools, and question whether every screw trajectory is genuinely achievable. Even experienced surgeons can overlook a conflict between plate position and tendon protection.
It should follow the lateral wall without excessive bending. A poor match may create pressure points or redirect screws. Fit can change after reduction.
CT shows fragment positions and three-dimensional contours more clearly than standard radiographs. Templates may look convincing but still misrepresent the restored anatomy.
Coverage should support the anterior process, posterior facet, and tuberosity. A narrow plate may miss key fragments. An oversized plate can complicate closure.
Review each trajectory with multiplanar imaging. A screw may look safe in one view but enter the subtalar or calcaneocuboid joint in another. Check the medial wall too.
No. Extra holes may increase flexibility but encourage unnecessary fixation. Useful holes should support real fragments without crowding the construct.
Titanium alloys are generally less stiff than stainless steel. This may reduce stiffness mismatch. However, lower surface hardness can make contouring more demanding.
A prominent edge can press against thin skin when swelling persists. Inspect the edge radius, screw prominence, and closure tension. Low profile helps, but it is not everything.
Place the template on a three-dimensional model and inspect the peroneal tendon region. Small conflicts become visible there. Incision planning, swelling, smoking status, and bone quality also matter.
Recheck the plate after reduction, because restored anatomy may change its relationship with the bone. Perfect fit is rare. A strong bench test cannot predict every wound problem.
Choosing the right Calcaneal Locking Plate begins with a clear understanding of the fracture pattern, bone anatomy, and the specific reconstruction goals. Assess whether the plate provides sufficient coverage for the calcaneal body, posterior facet, and sustentacular region while allowing flexible screw placement in multiple directions. Locking options should be matched to bone quality, fracture complexity, and the level of stability required, especially when fixation strength is a concern.
Material selection, plate thickness, contour, and surface profile are also important because they can influence soft-tissue compatibility and the risk of irritation. A suitable design should balance strength with minimal prominence and accommodate the patient’s anatomy. Finally, confirm that the system supports reliable imaging, intuitive instrumentation, and efficient surgical application. Reviewing screw lengths, targeting options, reduction access, and intraoperative visibility in advance can help improve fixation accuracy and support a more predictable surgical workflow.